Learn how to repair your PS5 PlayStation 5 Ethernet LAN port. Follow our step-by-step guide to get your console back online and enjoy seamless gaming.
Exploring Common Causes of Various Port Damage
Frequent Plugging and Unplugging
Ports are not built to withstand excessive wear and tear. Gamers who frequently switch between devices or rearrange their setups may find themselves repeatedly plugging in and unplugging cables. This continuous activity can strain the port and lead to damage over time.
Physical Impact
Physical mishaps such as drops or improper handling can exert undue pressure on ports. This can result in bent pins or internal damage that affects functionality.
Manufacturing Flaws
While quality control processes are stringent, some consoles may exhibit factory defects that go undetected. These defects can make ports particularly vulnerable to damage.
Should your port sustain damage, it’s crucial to understand the repair process. This article will delve into repair strategies and provide a case study on how technicians address and resolve such issues. By understanding these repair techniques, you can better manage and possibly prevent port damage to your gaming console.
Repairing Damaged Ports
In this following case-study we will show you how our tech repaired this broken ethernet port.
You will need a few tools to get this repaired. many of these tools can be found at https://www.ifixit.com/Tools
- Soldering Station
- De-soldering Pump or Solder Wick
- Replacement Port
- Flux
- Solder
- ESD Wrist Strap or Static Mat
- Magnifying Glass or Microscope
- Tweezers
- Isopropyl Alcohol and Cleaning Swabs
- Thermal Pads or Paste
- Multimeter
- Plastic Pry Tools and screwdriver set
Setting Up & Organizing Tools
Ensure the work area is clean, well-lit, and static-free. Utilize an anti-static mat under the PlayStation console to prevent electrostatic discharge.
Arrange all necessary tools within easy reach, including the soldering station, de-soldering pump, flux, tweezers, and a magnifying glass or microscope for better visibility.
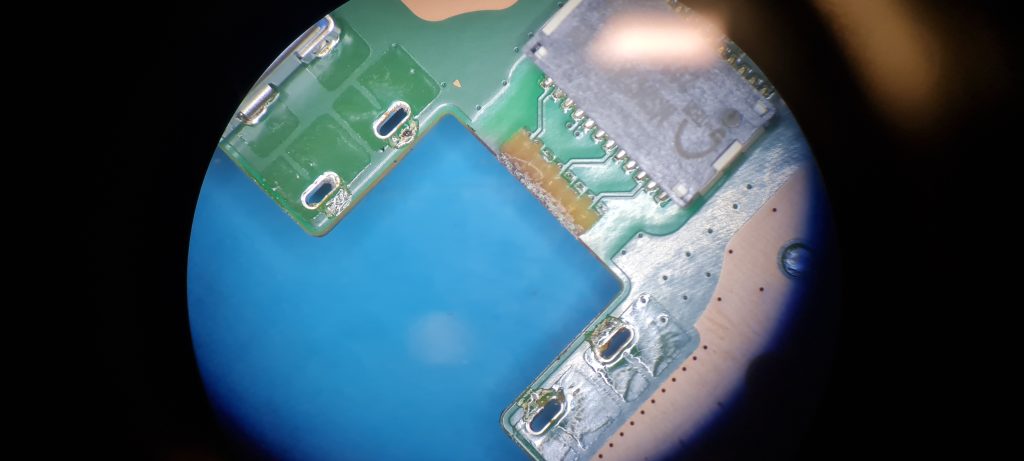
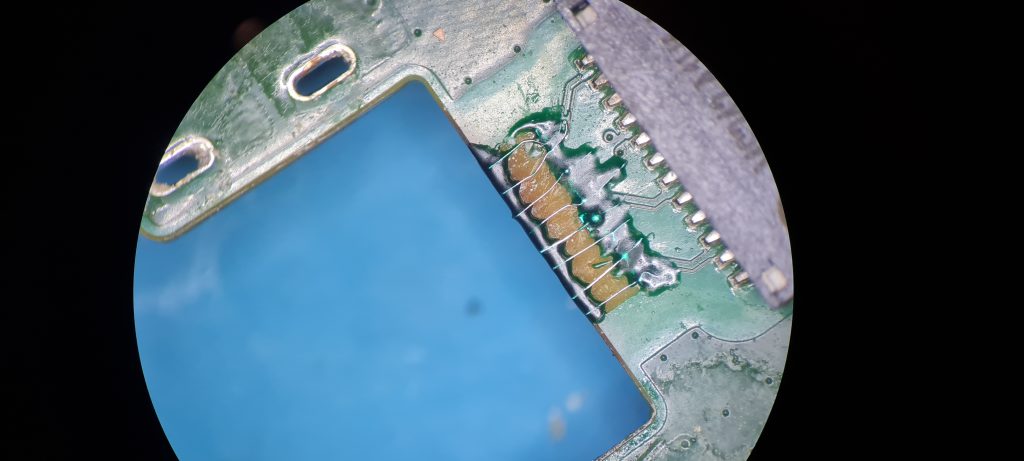
Lets get started, our tech has disassembled the motherboard as de-soldered the faulty port from the board. As you can see there is some damage on the board itself, this area will need to be cleaned.
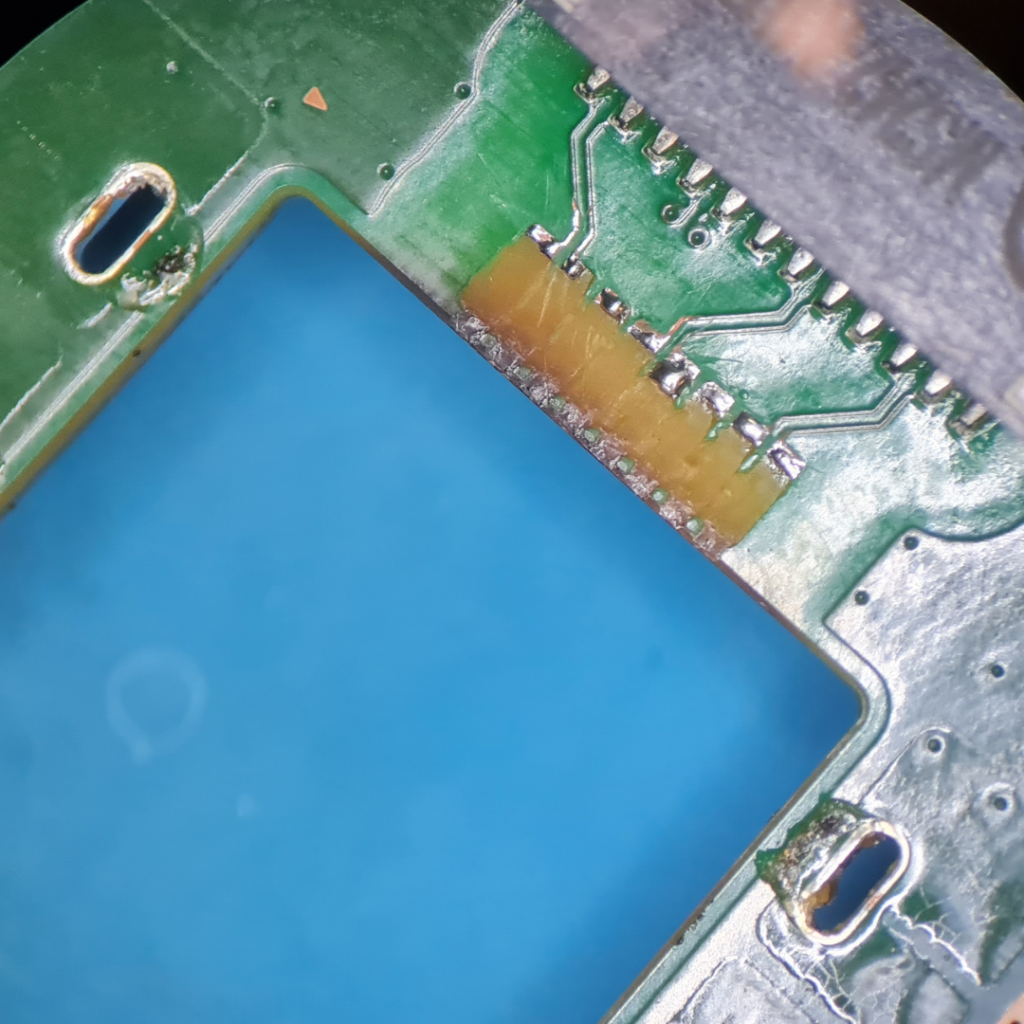
Once all pads has been removed, gently wiggle the Ethernet port to see if it is loose. If it does not move freely, check if additional solder needs to be removed. Use precision tweezers to carefully lift the Ethernet port out of its mounting on the motherboard. It’s crucial to perform this step gently to avoid lifting the pads off the motherboard.
After removing the Ethernet port, clean any residual solder from the mounting area using a solder wick and applying a small amount of flux. Use isopropyl alcohol and a cleaning swab to clean the area where the Ethernet port was mounted. This ensures that no flux or debris remains that could interfere with the installation of a new port.
Prepping the New Ethernet Port
Get a new Ethernet port ready. Inspect it to ensure it’s the correct part and undamaged.
Place the new port in position without soldering to ensure it fits properly. Check alignment with the solder pads and that it sits flat against the board.

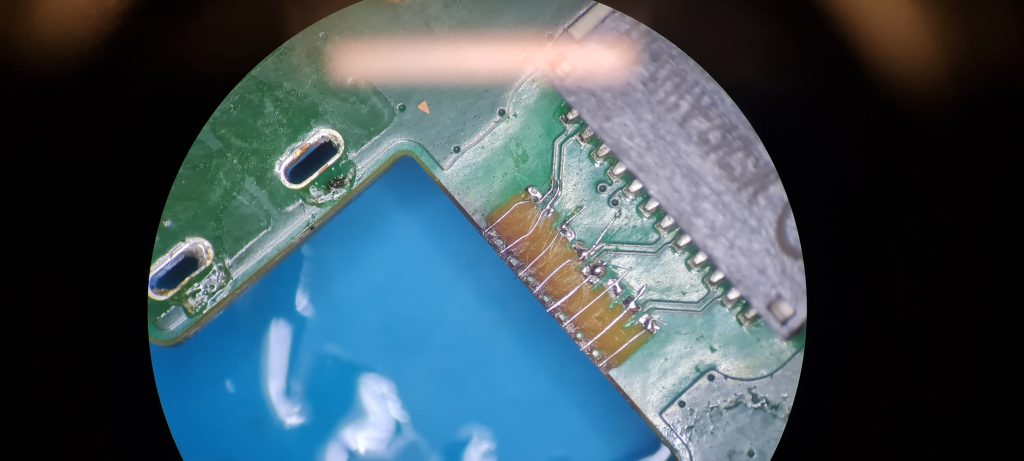
The next step is to redraw over the damaged traces. Use a trace repair pen to draw over the damaged traces. Trace pen dispense a silver-based compound that dries to form a conductive path. For added durability, you can carefully solder a thin wire along the newly drawn trace. This will reinforce the connection and ensure long-term reliability. Then use a multimeter to ensure proper electric conductivity.
With the new traces in place, the next step is to apply insulating material such as UV-curable solder mask over the repaired traces. Then allow any applied materials to cure fully according to their specific instructions.
Soldering the New Port
After repairing or reinforcing the PCB traces and applying an insulating coating, the next crucial step is to solder the new Ethernet port onto the motherboard of your gaming console. Carefully position the new Ethernet port over the cleaned and prepped pads on the PCB. Use tweezers to adjust the port, ensuring it sits flush against the board and is perfectly aligned with the solder pads. Apply a small amount of flux to each pad. Flux will facilitate better solder flow and help prevent bridges between contacts.
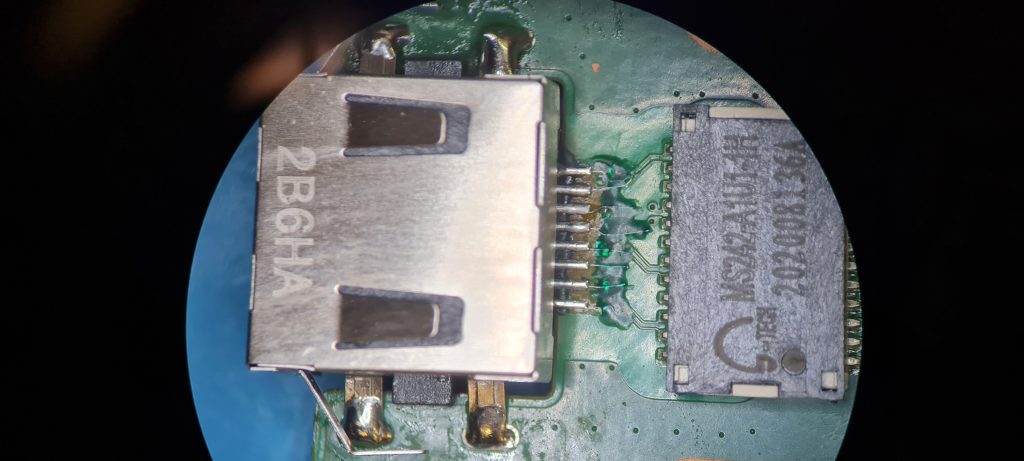
After all pins have been soldered, use a microscope or magnifying glass to inspect each joint. Look for clear, volcano-shaped connections without any blobs or excess solder that could cause a short. If any solder bridges are found, gently use solder wick or a de-soldering pump with your iron to remove the excess solder. Apply additional flux and re-solder if necessary.
Once all pins are securely soldered, clean the area with isopropyl alcohol and a swab to remove any remaining flux residue, which can cause corrosion or conductivity issues over time.
Check the solidity of the newly soldered pins by gently pressing against the port. They should not move or wiggle. Use a multimeter to perform a continuity check on each pin to ensure there are no cold solder joints or shorts
Final Steps
Once the soldering is verified, proceed to carefully reassemble the console, ensuring all screws and cables are returned to their proper places.
Then connect the console to power and a network via the Ethernet cable. Turn on the console and verify that it recognizes the network and can connect to the internet.
Optionally, run the console for an extended period under normal use conditions to ensure the repair holds up and the network connection remains stable.
We hope this article was useful in showing how to repair a broken ethernet LAN port on a ps5.
If you have any questions or feedback on this article, please contact us via our website or give us a call. And if you need something like this done, our technicians would be happy to help you.