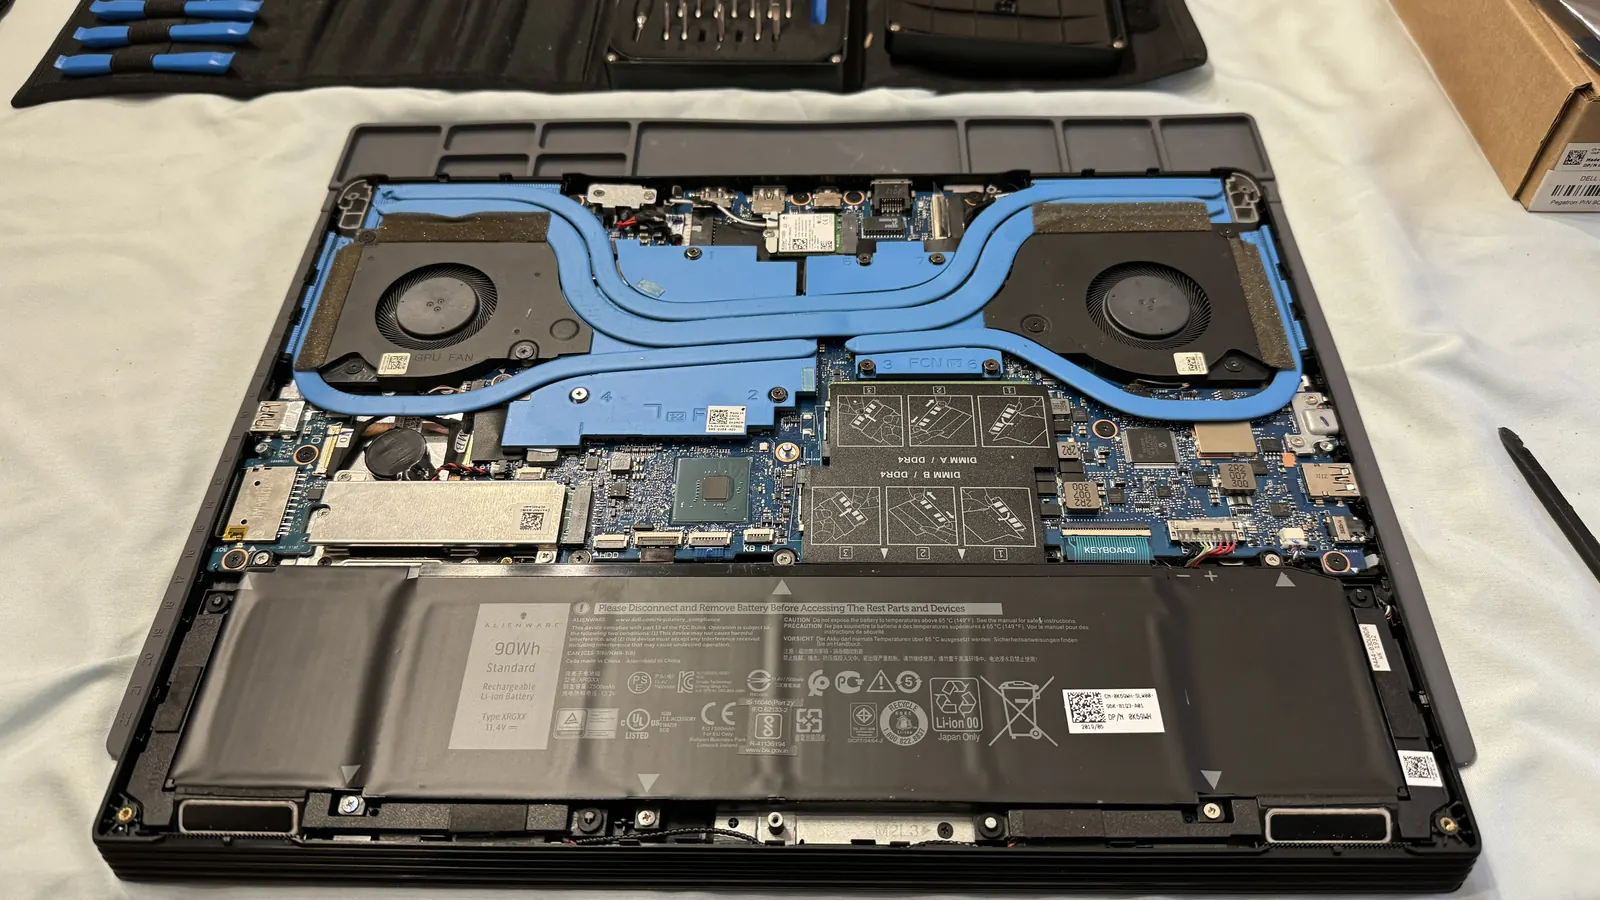











Repair videos make everything look easy. Sometimes it is. Swapping the RAM in a laptop with a removable bottom panel takes ten minutes and one screwdriver. Other repairs look just as simple on video and end with a torn cable, a cracked new screen, or a punctured battery. We see both outcomes every week, including laptops that come in mid-repair in a bag of screws. This is an honest breakdown of what's reasonable to do yourself, what tends to go wrong, what you'd need, and how to decide.
Repair by Repair: How Hard Is It Really?
Difficulty depends heavily on the model. A business laptop built to be serviced is a different world from a thin, glued-together ultrabook. As a general guide:
| Repair | DIY difficulty | Main risk |
|---|---|---|
| Adding RAM (if there's an open slot) | Easy | Buying the wrong type |
| Swapping an SSD | Easy to moderate | Data not backed up first |
| Cleaning dust from vents | Easy | Spinning the fan with compressed air |
| Removable external battery | Easy | Cheap, low-quality batteries |
| Software reinstall | Easy to moderate | Losing files without a backup |
| Internal battery | Moderate to hard | Puncturing a lithium battery |
| Fan replacement and thermal paste | Moderate to hard | Torn ribbon cables, wrong paste amount |
| Screen replacement | Moderate to very hard | Cracking the new panel, tearing the display cable |
| Keyboard replacement | Hard to very hard | On many laptops, the whole top case comes apart |
| Charging port | Hard to very hard | Often soldered to the motherboard |
| Hinge repair | Moderate to very hard | Cracked plastics, hinges bonded into the lid |
| Liquid damage | Very hard | Hidden corrosion keeps spreading |
| Motherboard repair | Not a DIY job | Needs microscopes and soldering equipment |
Good DIY Projects
On laptops with a removable panel and an open slot, this is one of the easiest upgrades there is. Check your exact model first. Many thin laptops have memory soldered to the board, and Apple silicon MacBooks have it built into the chip.
Very doable on laptops with a standard drive bay or M.2 slot. The hard part isn't the hardware, it's moving your files over. Back everything up first.
Compressed air in short bursts, at an angle, with the laptop off. Hold the fan still with a toothpick so the air doesn't spin it fast enough to damage the bearing.
Removing junk programs, running updates and reinstalling Windows or macOS are all doable at home, as long as your files are backed up first.
Older and some business laptops have batteries that unclip from the outside. Buy a reputable replacement; cheap batteries can be unsafe.
Repairs Better Left to a Shop
Many newer laptop screens are glued in or come as one assembly with the whole lid. Prying in the wrong spot cracks the new panel. The display cable is thin and easy to tear, and on touchscreens there's a second cable to worry about.
Lithium batteries can catch fire if punctured or bent, and many are glued into the case with strong adhesive. Prying them out is exactly how batteries get punctured. A swollen battery is already a hazard. This is the one repair we'd really ask you not to try.
On many laptops, especially MacBooks, the keyboard is riveted or glued into the top case. Replacing it means taking the entire laptop apart, and often replacing the top case.
On many laptops the charging port is soldered directly to the motherboard. Replacing it means desoldering on a board full of tiny components.
Drying a laptop out isn't the same as fixing it. Liquid leaves minerals behind that keep corroding the board for days and weeks. It needs to be cleaned off the board properly, and damaged components replaced.
Board-level work means finding a failed component among hundreds under a microscope and replacing it with specialized soldering equipment. That takes tools and years of practice.
The Things That Go Wrong Most
These are the mistakes we see most often on laptops that come in after a DIY attempt:
- Torn ribbon cables. Many connectors have a tiny locking flap that has to be lifted before the cable slides out. Pull without lifting it and the cable tears.
- Screws in the wrong holes. Laptops use screws of different lengths. A long screw in a short hole can punch through into the board underneath. Keep screws organized exactly where they came from.
- Static damage. A static shock you can't even feel can damage components. Work on a hard surface, touch something grounded, and avoid carpet.
- Cracked plastics and clips. Bottom panels and bezels are held by fragile clips that snap if pried wrong.
- Forgetting to disconnect the battery. Working on a laptop with the battery connected can short components.
- Cheap parts. Low-quality screens, batteries and keyboards often fail within weeks or don't fit right.
- Stripped screws. Using the wrong bit size strips tiny screw heads, which then won't come out at all.
Tools You'd Need
For anything beyond RAM or an SSD, a basic setup looks like:
- Precision screwdrivers with the right bits, often Phillips, Torx and Pentalobe for Macs
- Plastic pry tools and spudgers to open cases without scratching or cracking them
- An anti-static wrist strap or at least a grounded work surface
- A magnetic mat or labeled tray to keep screws organized
- Isopropyl alcohol for cleaning old thermal paste and adhesive
- Gentle heat for loosening glued parts, used carefully around batteries
- The exact replacement part for your model, which matters more than any tool
Parts Quality Matters
Not all replacement parts are equal.
- Original or OEM-quality parts fit and perform like the originals.
- Pulled parts come from other laptops. They're genuine but used.
- Low-cost aftermarket parts vary wildly. Some are fine. Some screens have washed-out colors or dead spots, and some batteries have far less capacity than advertised.
Part of what you're paying for at a shop is someone who knows which parts hold up and stands behind them.
Warranty and Right to Repair
- Manufacturer warranty: if your laptop is still under warranty, check the terms before opening it. In the US, a manufacturer generally can't void your whole warranty just because you opened the laptop or used third-party parts, but damage caused during a DIY repair usually isn't covered.
- Self-repair programs: some manufacturers, including Apple, offer official parts, tools and manuals for certain repairs on certain models. They can be a good option if you want to do it yourself with genuine parts.
- Shop warranty: a professional repair should come with its own warranty. Every Fixoid repair comes with a 90-day warranty on parts and labor.
Questions to Ask Before You Try It Yourself
- Is there a repair guide for my exact model? Not a similar one. Your exact model.
- Is anything glued? Glue usually means heat, patience and a higher chance of breaking something.
- Do I have the right tools and the exact part?
- Is my data backed up? Any repair can go wrong.
- What happens if I break it? If the answer is "I'd need a new laptop," the repair is probably worth paying for.
- Is my time worth it? A two-hour first attempt is often a 30-minute job for someone who does it every day.
If You Start It and Get Stuck
It happens more than you'd think, and there's no shame in it. Put every screw and part in a bag, take photos of anything you remember, and bring it in. Tell us exactly what you did and in what order. The sooner the better, especially if a cable or connector got damaged along the way.
Ready to hand it off?Start a repair online or walk in to our Vancouver or Portland store.Frequently Asked Questions
Is it hard to replace a laptop screen yourself?
It depends on the model. Some older laptops have screens held in with a few screws. Many newer ones are glued or come as a full lid assembly, where it's easy to crack the new panel or tear the display cable.
Can I upgrade my laptop's RAM or SSD myself?
Often, yes, if your laptop has open slots and a removable panel. Many thin laptops and all Apple silicon MacBooks have memory and storage built in, so they can't be upgraded. Check your exact model before buying parts.
Is it safe to replace a laptop battery at home?
Removable batteries that unclip from the outside are safe. Internal batteries are often glued in, and puncturing or bending one can cause a fire. If the battery is swollen, stop using the laptop and bring it in.
Will opening my laptop void the warranty?
In the US, opening a laptop generally doesn't void the whole warranty by itself, but damage caused during a DIY repair usually isn't covered. Check your manufacturer's terms before you start.
Can I replace my laptop's charging port myself?
On some laptops the port is on a small separate board and can be swapped. On many, it's soldered to the motherboard, which takes soldering equipment and experience.
What tools do I need to open a laptop?
Precision screwdrivers with the right bits, plastic pry tools, an anti-static strap or grounded surface, and a way to keep screws organized. Glued parts also need gentle heat.
What if I started a repair and couldn't finish it?
Bring it in with every part and screw, and tell us what you did. We'll pick up where you left off.